Maintaining student records is essential when homeschooling. Records are important for tracking student progress, showing academic accomplishments, and are necessary for those students moving on to college.
Homeschoolers should produce their own transcripts for each of their student’s school years showing the grades and credits earned. This post will focus on producing an end-of-year transcript using Discovery K12’s Parent/Teacher Account transcript app.
Learn More About The Parent/Teacher Account
Transcripts should be produced at mid-year and at the end of the school year in the United States. Quarterly options are also available. If you are following a traditional school-year calendar, starting in the fall and finishing before summer, you’ll want to produce your mid-year transcripts in January at about 90 Days into the school year, and end-of-year transcripts in June after completing courses.
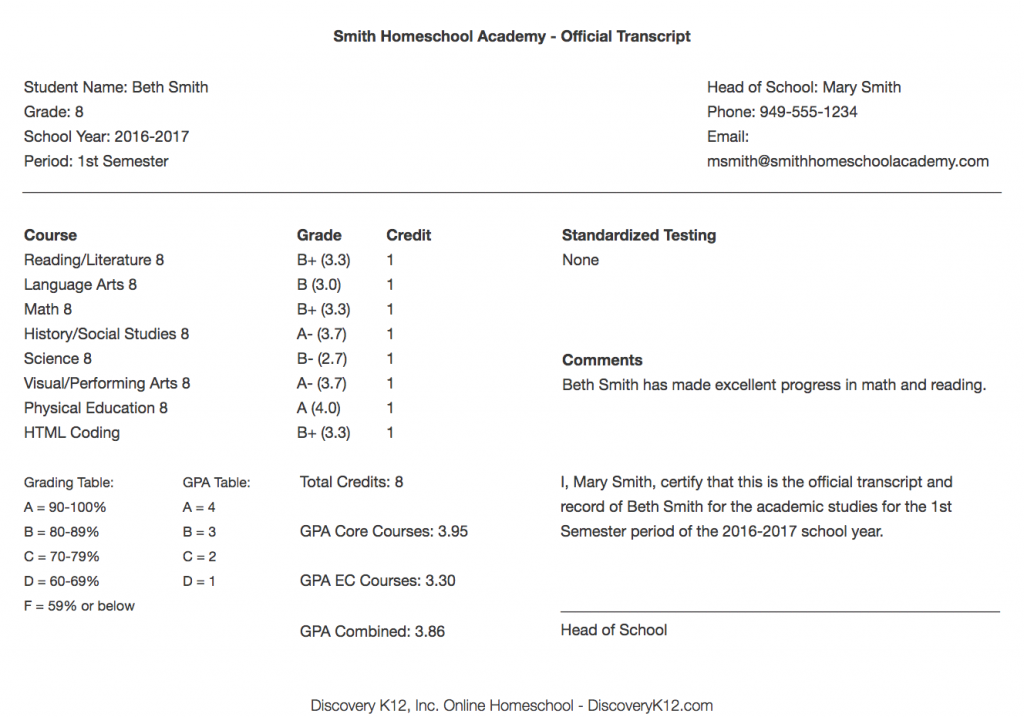
The DK12 transcript app is it’s really easy to use, it’s flexible, and takes just a few minutes to produce a transcript. A variety of options allow for any combination of courses taken, whether through Discovery K12’s curriculum or other resources. Featured below is a filled-in transcript.

The Transcript App will automatically populate all of your homeschool data such as your school name (if you have one), Head of School contact, and student information. Each transcript produced can be saved online and printed for your records.
Producing the Transcript
You will need the following data to produce a student’s transcript: course name, the grade for each course, standardized testing or assessment test results (if you have done them), other extra curricular activities or volunteer programs, and any comments. Once you have your data together, it takes just a few minutes to produce the actual transcript.
Step 1 –
Inside the Parent/Teacher Account, click the “Transcripts” link for the student’s name that you will create the transcript for.

Step 2 –
On the transcript app, select “End-of-Year” and the grade level of your student. Select 1 credit. Then, all you need to do is select or enter the course name and select its grade. If you are using DK12 curriculum exclusively, you can select each course from the dropdown fields under Core Courses and Extra Curriculum. There are 5 additional “Other Courses” areas that let you enter courses taken outside of DK12’s curriculum.
Step 3 – Enter any test results for standardized tests that have been taken (such as SAT or STAR testing) and any comments about the students progress, volunteer/community efforts, sports or extra curriculum activities, awards or other accomplishments you’d like to show on the transcript.
Step 4 – Select the number of Core Courses and the number of Extra Curriculum Courses taken, and the transcript app will automatically calculate the credits and GPA for you. The grading table on the transcript app is a standard percentage-based system where above 90% is an A, above 80% is a B, etc.; and the Grade Point Average (GPA) of above 4 is an A and above a 3 is a B, etc.
Step 5 – Click “Create Transcript” and your new transcript will appear at the top of the page to print, sign, and save for your records.
You can learn more about Discovery K12’s Parent/Teacher Account features here.
Learn More About The Parent/Teacher Account
